January 13, 2023
A Bunny And His Eggs
Summary
Learn how to make this wooden Easter Bunny and eggs. It is a quick and inexpensive project that has a really high "cute factor".
This whole Easter Bunny thing is kind of crazy if you stop to think about it. I remember the first time I saw the Cadbury Bunny clucking like a chicken. I think I was in college and my sister and I were watching TV. Maybe we were just overly tired, but we could not stop laughing at a clucking rabbit.
Well, this bunny doesn’t cluck but it is super cute. These were a Chics With Tools Workshop last year and thought I would show you how we made them.
MATERIALS
1 1″ X 10″ X 6′ board
Stain
Paint
Brushes
Dowel rods cut to about 3″
Drill
Glue or nail gun
STEPS
- Make a pattern. I looked at a bunch of clipart then made my own pattern. I wanted the bunny to be able to sit without assistance with chubby hind legs. For that you need a main body, hind legs, and an egg.
- Cut the pattern out of poster board or card stock.
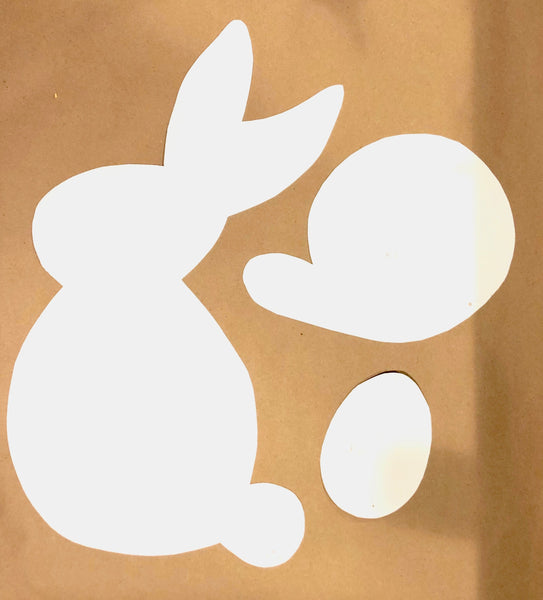
- Trace the pattern onto the board. Be sure to do two hind legs and at least four eggs.
- Cut the pieces out with a band saw or jig saw.

- Sand the rough edges and round them over a little.

- Stain each piece. This is sort of a base coat.

- With white paint, dry brush all of the pieces on all sides. You do this by having only a small amount of paint on a totally dry brush. Rub any excess paint off on a piece of paper or scrap wood. Then loosely brush on the wood.

- If you have an area that is supposed to be rounded, brush in a circles, following the contours of the piece. This is especially important on the thighs of the bunny.

- Continue using the dry brush technique and paint the eggs. If desired, add some shadows and highlights to make everything seem more three-dimensional.
- Drill holes in the bottoms of the eggs. Doing the same in the bottom of the bunny is optional.

- Line up the main body with a board topped by one leg. The point here is that when assembled, you want the piece to stand on its own without wobbling.
- Either glue or nail it together. Turn it over and repeat with the other leg.

- If you want the bunny and eggs to be one unit, attach the eggs to the body of the bunny and each other.

- If you want to display yours in a container, do the following:
- Fill your container with floral foam.
- Add the dowel rods to the eggs ( and bunny).

- Put bunny and eggs in the floral foam.
- Cover the oasis with green or Spanish moss.

- Display these cuties on the table, sideboard, front door, or fireplace and enjoy!

So as you can tell, these are not complicated nor expensive. Give one a try and when you do, show me on our Facebook page.

By the way, these would look great in our Triple Brick Mold.
